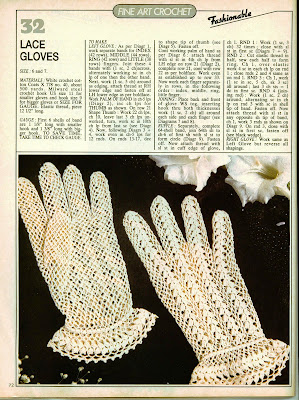
Do you want to learn how to crochet lovely vintage gloves?
Here it is, right at your fingertips, everything you need to turn your hand to crocheting gloves.
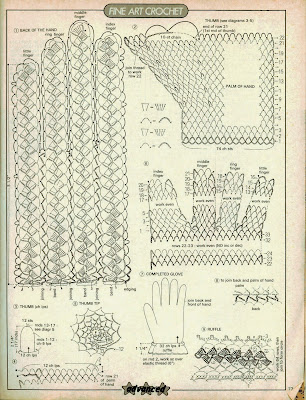
Follow the easy step-by-step instructions of this vintage crochet pattern to make this stylish set of gloves in crochet. There is absolutely no charge for personal use of this easy crochet glove pattern.
Instructions are right down to the last detail – and easy as pie to understand and follow.
NOTE
These crochet lace gloves are a medium size.
STEP-BY-STEP INSTRUCTIONS
Crochet gloves pattern free.
Easy crochet gloves pattern.
To enlarge click on the image
Author: lanadearg
How to Crochet Easy Baby Blanket- Free Crochet Pattern
Beautiful, simple and easy pattern for a baby blanket. Something that’s quick to make.
This easy baby blanket is knit using two colors, with lace knitting for the edges.
The blanket is a beautiful open work pattern using a simple and beautiful stitch crochet pattern.
Free pattern for beginners.
Can be knit to any size.
Free Baby Blanket Crochet Pattern. Crocheting a simple easy babies blanket is a delightful way to welcome a new arrival into the world, something you have created with love.
Abbreviations
US Crochet Abbreviations:
ch = chain
sc = single crochet
st = stitch
sl = slip
dc= double crochet
Follow the link Instant download
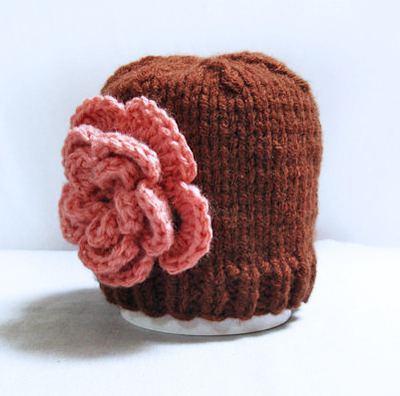
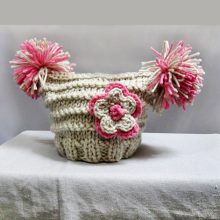
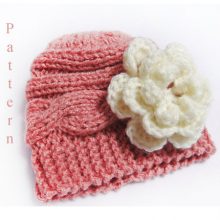
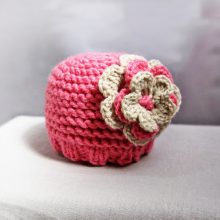
How to Knit a Baby Hat- Simple Baby Hat Free Pattern for Beginners
Easy knit hat patterns for beginners are perfect project for your baby.
Following this pattern, you can knit the hat for girls and/or for boys. Whether you are knitting for girls or boys or both, you will find plenty of great-looking, quick-to-knit, easy-to-wear projects to keep your small people cozy. Of course do not knit a flower for boy. You can use as many or few colors as you like.
Skill level: Beginner
Knitting skills: knit, purl, decrease, work in rounds
Size / Head Circumference:
0-3 mo: 13″ – 14″ (33-36 cm)
3-6 mo: 14″ – 16″ (36-41 cm)
Materials: 5.00 oz / 140 g ; 255 yd / 233 m; Weight category: 5/ bulky
Knitting needles:
Set of five double-point needles 4.5 mm (7 US) – for size 0 to 6 mo.
11.5″/29cm 4.5 mm (7 US) circular needles – for size 6 mo. To 3 yrs.
Gauge:
5 sts x 8 rows = 2″ in Stockinette Stitch
Pattern:
Cast on 44 [48] stitches onto 3 needles
Round 1-6: work rib *k2, p2* to end of round.
Round 7-13[7-15]: Switch to stockinette stitch (knit all rounds) and continue until hat measures 3.5[3.7] inches from cast on edge.
Crown Shaping
Decrease top of hat as follows:
Round : *k5, k2tog* repeat to end of round, k2 => 38 [42] stitches remaining
Round : knit
Round : *k4, k2tog* repeat to end of round => 32 [36] stitches remaining
Round : *k3, k2tog* repeat to end of round => 26 [30] stitches remaining
Round : knit
Round : *k2, k2tog* repeat to end of round => 20 [24] stitches remaining
Round : *k2tog* repeat to end of round => 10 [12] stitches remaining
Break off yarn. Using blunt needle, thread yarn through stitches and pull to tighten. Weave in all ends.
Copyright Information
• All photos are copyrighted and all rights to this pattern are owned by Giftseshop.com.
Patterns are for personal use only. The pattern cannot be sold, traded, published or handed out to others.
Abbreviations :
RS right side
WS wrong side
K knit
P purl
K2tog knit 2 sts together
Rep repeat
DPNs double-point needles
CN circular needles
SS Stockinette Stitch (knit all stitches
on all rounds)
Download this pattern as image:

This article related: free knitting patterns for baby
If you would like to purchase completed hat here is the link: Knit baby girl hat newborn beanie
Other knit baby hat patterns in giftseshop.com
Click on image:
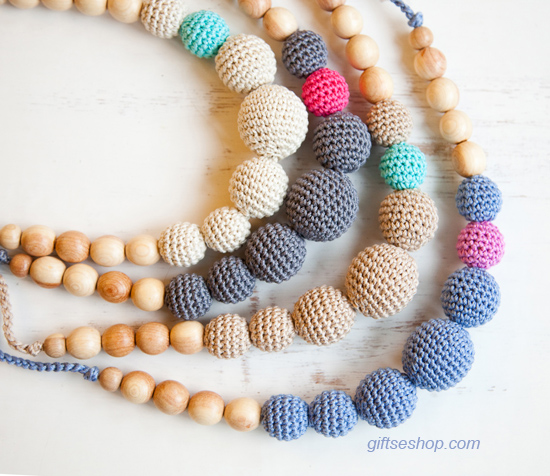
How to Make Crocheted Beads and Crocheted Beads Necklace Free Pattern
Crocheting lovers enjoy crochet bead necklace- free pattern. Stylish accessory they seem to be super trendy today.
Materials & Tools:
1. Cotton thread
2. Use proper size of crochet needle for the yarn you chose to use for the bead.
I use Crochet hook: 1.9 mm
3. Plastic or wooden bead 20mm
4. Tapestry Needle with long eye
Crochet Abbreviations
ch = chain
sc = single crochet
sc2tog=single crochet 2 together
st = stitch
sl knot = slip knot
sl st = slip stitch
fo = fasten off
Patterns:
Crochet On 20mm bead
Start the bead with a magic ring
Round1: ch2, 8sc in ring (8 st)
Pull the stray end taut
Round 2: *2sc in each st* repeat 8 times (16 st)
Round 3: *1sc in first st, 2sc in next st* repeat 8 times (24st), mm
Round 4 – r8: 1sc in each st first st, around, mm
Continue crocheting without increasing while your bead is almost covered with a crocheted cozy
Insert bead
Round 9: * sc2tog in first st, 1sc in next st* repeat 8 times (16st), mm
Round 10: *2sc in first st* repeat 8 times (8st)
Fasten off with a 3-4″ end.
Use a tapestry needle to insert the start tail through the hole and come out from the other side.
The thread ends I hide inside the bead.
You have learned how to crochet beads, now you can do crocheted jewelry,
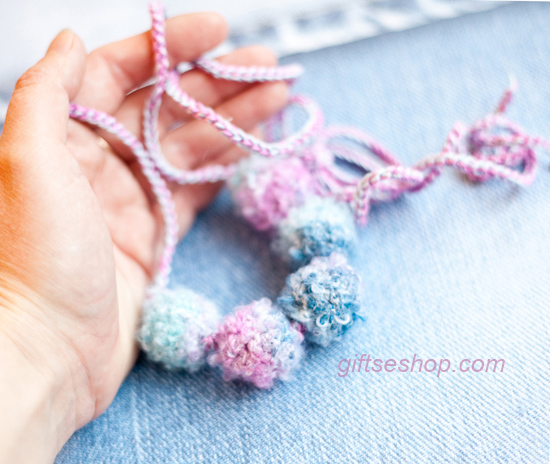
such as this nursing necklace. Nursing necklaces are simply a necklace or piece of jewelry made for moms who happen to have small children. Nursing necklaces are simply a necklace or piece of jewelry made for moms who happen to have small children. Nursing necklace very easy to do and it’s great!
These beads crocheted from fluffy yarn. Very good for beginners, fluffy yarn hides all flaws.
I love these crocheted beads necklaces are not only for children but are very good as a rope necklace for the summer and they can be made in boho style.
Good luck!
Have a look more free crochet patterns
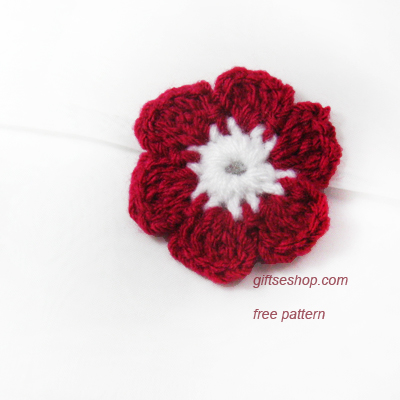
Free Crochet Flower Pattern Six Petals
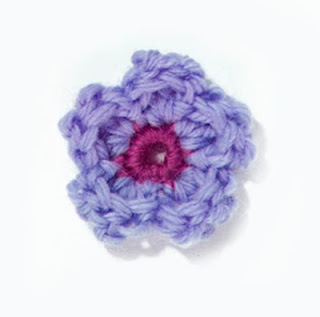
I created the crochet pattern for little flower .
These little crocheted flowers are so quick and easy to make. Good project for beginners.
These little flowers can be used in various different projects. Use them to embellish bags, hats, clothing or make them into brooches, hair accessories. Try making lots of them and string them together as a scarf or to make your own flowery bunting decoration.
Using white color:
Begin with a magic loop with sl st.
Round 1 – Chain 1 then single crochet 10 stitches into the ring, slip stitch into the first stitch to end
Fasten off and join burgundy color threads for petals to any outside stitch
Round 2 – ch3, 3 double crochet in the next stitch, ch3, slip stitch in the next stitch – first petals
ch3, 3 double crochet in the next stitch, ch3, slip stitch in the next stitch – second petals
ch3, 3 double crochet in the next stitch, ch3, slip stitch in the next stitch – third petals
ch3, 3 double crochet in the next stitch, ch3, slip stitch in the next stitch – fourth petals
ch3, 3 double crochet in the next stitch, ch3, slip stitch in the next stitch – fifth petals
ch3, 3 double crochet in the next stitch, ch3, slip stitch into the first stitch of the first petals – sixth petals
Fasten off.
©giftseshop.com
Note: You can place this material on your blog only with reference to this page
*************
Have a look other free patterns:
 5 petal crochet flower pattern
 easy crochet flower appliqué free pattern
Free Knitting Pattern Baby Booties Uggs Knitted with Straight Needles
Sizes: Newborn-3 month
Pair US 5 straight needles
Yarn: 1 ball DK yarn
Pattern:
Knit them in a soft baby yarn for a special present for a new baby. If you use cotton yarn and they will be perfect for spring and summer.
Your Baby will feel them comfortable and warm…
Straight needles.
Easy to make. Skill Level – beginners. You need to know basic stitches and have some experience in knitting from patterns.
These baby booties are easy to make and take so little time. You can make a pair in every color of the rainbow.
Follow this link for download baby booties uggs pattern! Baby Booties Ugg Free Knitting Pattern
 Have a look other baby booties shoes pattern
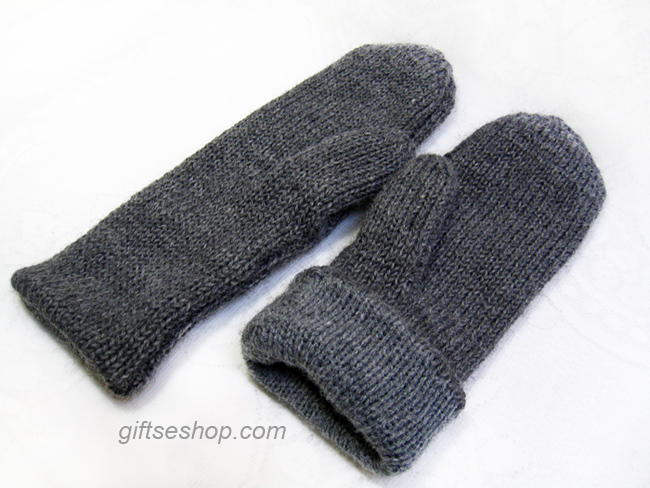
Free Mitten Patterns — Double Knit Mittens
How to knit mittens, easy pattern for beginners- free mitten patterns.
If you’d like your own pair of double thick mittens, here’s how I made them.
These mittens are knit separately then put together later.
I knit mittens using wool on the outside layer and acrylic on the inside. The mittens are knit in the round on dpns.
Sizes: adult medium
Yarn: category 4 worsted weight: afghan, aran yarn
UK/Australia approximate equivalent: 10 ply, Aran weight
Needles: 3.75 mm 32” 1 set of Usa 5 DPNs (UK9) or use needle size to get gauge.
Gauge: 4.5 stitches per inch
Pattern:
Cuff:
In wool, cast on 44 sts on a US #4 dpn.
Divide sts on three dpns. Join.
Knit around or work k2, p2 ribbing. Continue for 4-4,5 inches, depending on how long you want the wrist of your mitt.
When you knit the last 2 stitches on a needle, pull both yarns snugly to prevent a gap. Do the same after the first 2 stitches on each needle.
Hand:
Thumb: Knit 8 stitches and place onto waste yarn. Knit rest of round. Cast on 8 stitches over thumb hole.
Continue knitting every round for 5” more.
Begin decreasing:
This takes some shifting of sts in order to knit 2tog of the same yarn.
Round 1: dec 4 sts.
Round 2: dec 4 sts.
Round 3: dec 4 sts.
Round 4: dec 4 sts.
Round 5: dec 4 sts.
Round 6: dec 4 sts. = 20st
Round 6: k2tog = 10st
Cut yarns and draw through remaining sts.
How to knit thumb:
Put thumb stitches on needles, and with pick up stitches knit around thumb hole. (16sts)
Knit every round until thumb measures about 2 inches or as long as desired.
K1, k2tog, k1, k2tog, repeat =11sts
k2tog, repeat every stitch (6 sts). Break yarn and pull through remaining stitches.
Complete second mitten as first one.
Free mitten patterns from giftseshop.com.
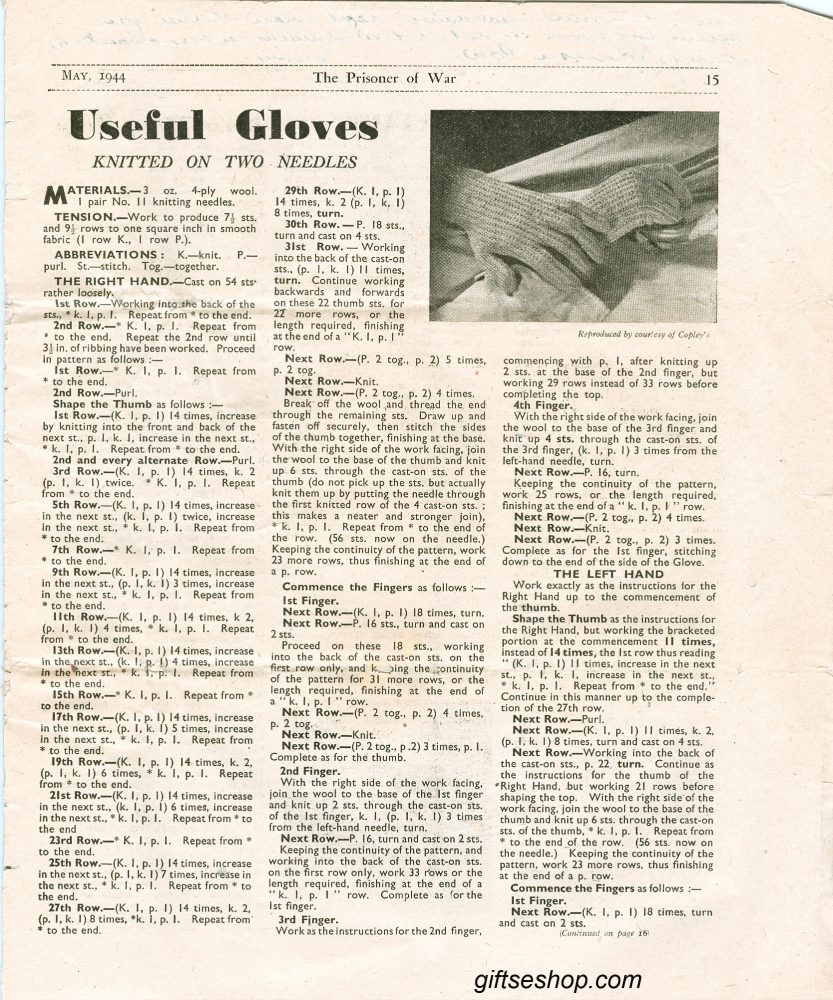
 Have a look Knitting Pattern: Two-Needle Knitted Gloves
 Have a look other mittens pattern
Knitting Pattern for Gloves on Two Needles
Knitting gloves on two needles – 1944 pattern
This vintage pattern about how to knit gloves on straight needles.
Many vintage glove patterns were designed for straight knitting needles.
Pattern is easy and knit gloves don’t take too long.
I love straight needles
I want to knit everything on straight needles — absolutely everything.
Knitting Pattern: Two-Needle Knitted Gloves
Skill Level: Intermediate
Abbreviations
K = knit
Sts = stitches
P= purl
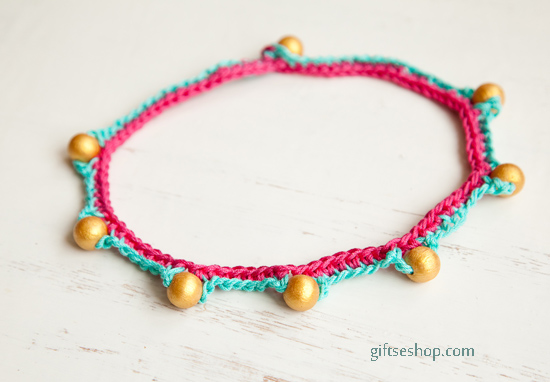
Crochet Beads Necklace or Bracelet Free Pattern Tutorial
Crochet jewelry for beginners. This necklace is an easy beginning crochet pattern.
I used beautiful hand painted beads.
Crochet Hook: Size 2 mm its US B/1or UK 13 or your preferred size
Detailed Instructions
Thread 8 beads on crochet cotton thread.
Work with thread blue
Row 1 – Ch20, bsc, ch10, bsc, ch10, bsc, ch10, bsc, ch10, bsc, ch10, bsc, ch10, bsc, ch10, bsc,ch20
Attach pink yarn
Row 2 – ch6, sc in third st of blue row (buttonhole), sc in each stitch to end
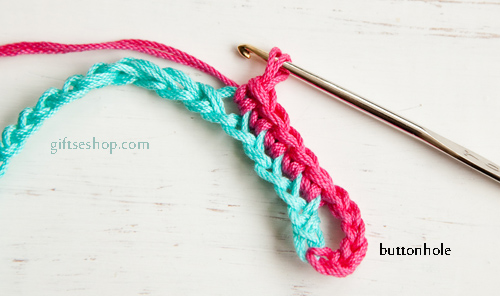

Finish off, attach last bead, weave in end.
Crochet Abbreviations
sl = slip stitch
ch = chain
sc = single crochet
bsc* = beaded single crochet
*Bead Single
Crochet: (bsc): Do a normal single crochet, except after you put your hook through the stitch in the previous row, pull a bead up to your hook and then yarn over using the crochet cotton thread on the far side of the bead. Then pull the loop through the stitch in the previous row. You will now have two loops on the hook and the bead will be looped against the piece. Yarn over and pull through both loops to complete the single crochet.
Crochet beaded necklace or bracelet pattern free.
Have a look more free crochet patterns
Common Crochet Abbreviations and Symbols
Common Crochet Abbreviations
approx approximately
beg begin(ning)
bet between
blp back loop only
BP back post
CC contrast color
ch chain
dc double crochet
dec decrease(s)(d)(ing)
dtr double triple crochet
flp front loop only
foll follow(ing)
FP front post
hdc half double crochet
inc increase(s)(d)(ing)
MC main color
pat pattern
rem remaining
rep repeat
rib ribbing
RS right side
sc single crochet
sl st slip stitch
st(s) stitch(es)
tog together
tr triple crochet
WS wrong side
yo yarn over hook
* = The pattern will specify how many times to repeat a series of instructions following an asterisk, or between asterisks.
( ) = The pattern will specify how may times to repeat a series of instructions that are given inside the parentheses.
[ ] = The pattern will specify how many times to repeat a series of instructions that are given inside the brackets.
“ = inches
Crochet — US chart symbols
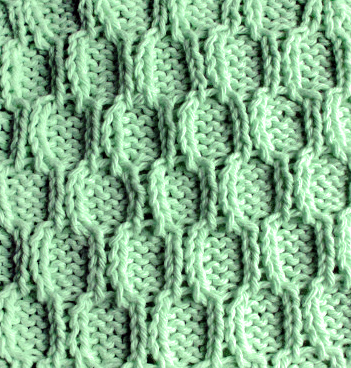
Trellis Stitch — Honeycomb Knitting Stitch Patterns
Honeycomb trellis cable knitting stitch pattern.
Cast on multiples of 6 + 2.
Rows 1 & 3: *P2, K2, P2*
Row 2 and Alt Rows: K the P stitches and P the K stitches of the previous row
Row 5: *Sl 2 stitches on to cable needle and leave at back of work, K1, P2 from cable needle, Sl 1 on to cable needle and leave at the front of work, P2, K1 from cable needle*
Row 7 and 9: *K1, P4, K1*
Row 11: *Sl 1 on to cable needle and leave at front of work, P2, K1 from cable needle, Sl2 onto cable needle and leave at back of work, K1, P2 from cable needle*
Row 13: Repeat from row 1.
Aran honeycomb stitch
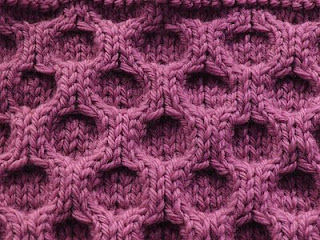
Aran knitting from http://lanahobby.blogspot.com
Classic aran honeycomb stitch, aran knitting.
Works on multiples of 8 stitches.
Row 1 – (Wrong side): Purl
Row 2: *Slip 2 stitches to cable needle and hold in the back. Knit 2, then knit 2 off the cable needle. Slip 2 stitches to cable needle and hold in front. Knit 2, then knit 2 off the cable needle. Repeat from * across.
Row 3: purl
Row 4: Knit.
Row 5: purl
Row 6: *Slip 2 stitches to cable needle and hold in front. Knit 2, then knit 2 off the cable needle. Slip 2 stitches to cable needle and hold in back. Knit 2, then knit 2 off the cable needle. Repeat from * across.
Row 8: Knit.
Repeat these 8 rows for pattern.
Knitting Abbreviations and Symbols
approx = approximately
beg = begin(s)(ning)
bet = between
BO = bind off
bpdc = Back Post double crochet
btwn = between
care washing cleaning
CC = contrasting color
ch(s) = chain(s)
ch-space = space previously made
cn = cable needle
CO = cast on
cont = continu(e)(s)(ing)
dbl = double
dc = double crochet
dec = decreas(e)(s)(ing)
dpn(s) = double pointed needle(s)
dtr = double treble (triple) crochet
est = establish(ed)
ext = extension
foll = follow(s)(ing)
fpdc = front post double crochet
fpsc = front post single crochet
fptr = front post triple crochet
hdc = half double crochet
inc = increas(e)(s)(ing)
k = knit
k1b = knit 1 in the row below
k1b = knit through the back loop
k2tog = knit 2 together
k2togb = Knit 2 stitches together through back loop
k3tog = knit 3 together
k3togb = Knit 3 stitches together through back loop
Kfb = knit in front and back of st
lp st = loop stitch
lp(s) = loop(s)
M1 = make 1
M2 = make two
MC = main color
meas = measure(s)
ndl(s) = needle(s)
opp = opposite
p = purl
p1b = purl through the back loop
p2sso = pass 2 slipped sts over
p2tog = purl 2 together
p2togb = purl 2 together in back
p3tog = purl 3 together
pat = pattern
Pm = place marker
psso = pass slipped stitch over
PU = pick up
rem = remain(s)(ing)
rep = repeat(s)(ing)
rev = revers(e)(ing)
Rev St st = reverse stockinette stitch
rf = right front
RH = right hand
rnd(s) = round(s)
RS = right side
rsc = reverse single crochet
S2KP or S2KP2 = slip 2 stitches together, knit 1, pass two slip stitches over
sc = single crochet
sc2tog = single crochet 2 together
sc3tog = single crochet 3 together
sk = skip
sk2p = Slip 1, k2tog, pass sl st over
skp = slip 1, knit 1, pass slipped stitch over
sl = slip
sl st = slip stitch
slip1-k1-psso = slip 1, knit 1, pass slip stitch over
sm = slip marker
sp(s) = space(s)
sq(s) = square(s)
ssk = slip, slip, knit
St st = Stockinette stitch
st(s) = stitch(es)
t-ch = turning chain
tbl = through the back loop
tog = together
tr = treble (triple) crochet
work even
WS = wrong side
wyib = with yarn in back
wyif = with yarn in front
yo = yarn over
yrh = yarn over (yarn round hook)
” inch(es)
( ) work instructions between parentheses, in the place directed
[ ] work instructions between brackets, as many times as directed
* repeat instructions following the single asterisk as directed
* * repeat instructions between asterisks, as directed
Knitting Chart Symbols
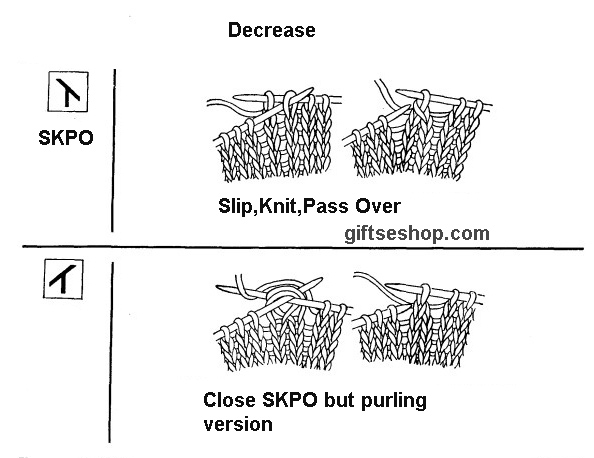
Knitting Decrease
This is a decrease most commonly seen in older patterns.
1. Slip 1 stitch knitwise from the left needle to the right needle.
2. Knit the next stitch on the left needle.
3. Insert the tip of the left needle into the slipped stitch and bring it over the knitted stitch and off the needle as if you were binding off.
To work a psso on the purl side, do the following:
1. Purl 1 stitch.
2. Slip the next stitch knitwise to the right needle, and return it in this changed direction to the left needle.
3. Transfer the purled stitch (from Step 1) from the right needle to the left needle.
4. Insert the right needle into the slipped stitch and bring it over the purled stitch and off the needle.
